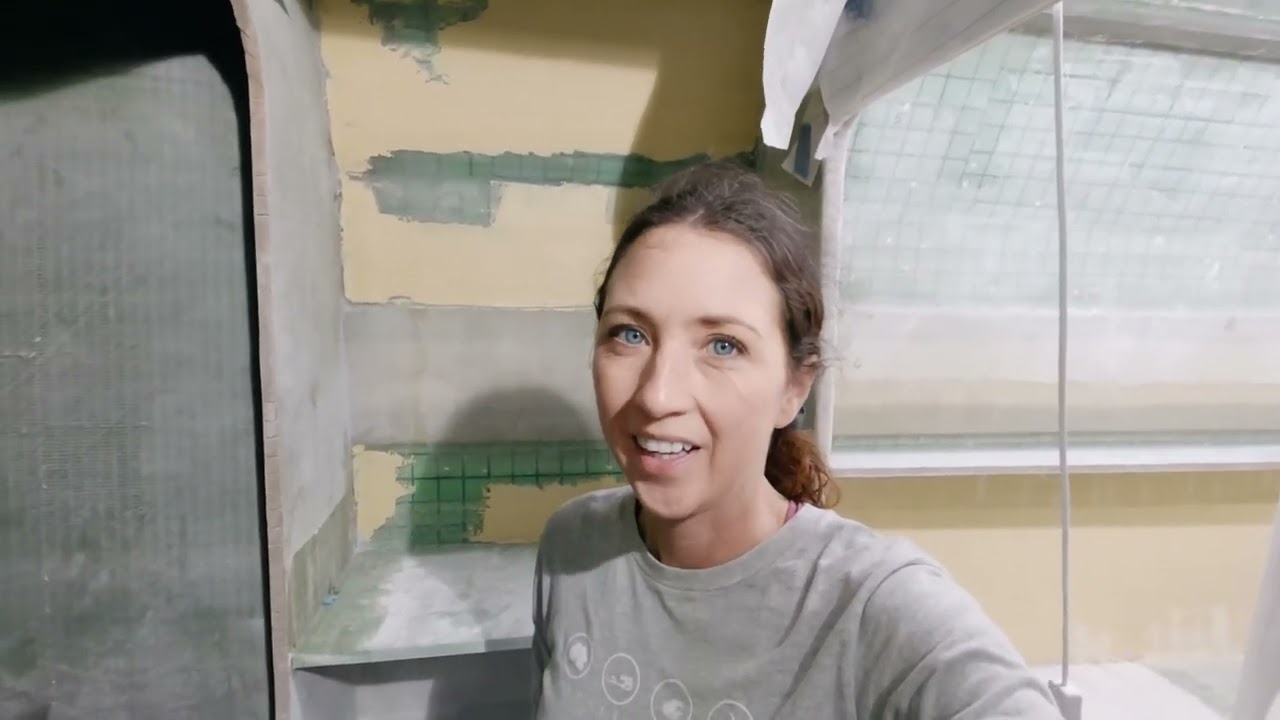
Începeți să vorbiți o nouă limbă în 3 săptămâni cu Babbel .🎉 Obțineți până la 60% reducere la abonament ➡️ AICI: https://go.babbel.com/t?bsc=1200m60-youtube-mjsailing-dec-2022&btp=default&utm_term=generic_vdium& =paidsocial&utm_source=YouTube&utm_content=Influencer..mjsailing..SUA..YouTube Ne-am întors la construirea pe propria noastră barcă, iar câteva schimbări MARI au loc în această săptămână! În primul rând, trebuie să facem puțină „ivernare” a tablierului podului pentru a ne asigura că putem păstra cât mai multă căldură posibil în această iarnă. Apoi, mă ocup de niște spații mari în dana noastră din față pentru a pune un nou compus de carenaj, care schimbă complet aspectul lucrurilor. Deplasându-mă puțin mai în spate, mă lupt cu o zonă, dar, din fericire, nu mă împiedică să termin nimic altceva. Dar, cea mai mare schimbare pentru noi, este că în sfârșit luăm o decizie cu privire la aspectul salonului nostru și începem să așezăm piesele de bază din spumă care ne vor face canapeaua. Singurul lucru este că, pe măsură ce construim acest lucru, decidem să facem o schimbare majoră față de ceea ce a planificat designerul. Asigurați-vă că îi dați un ceas și spuneți-ne mai jos ce părere aveți. Bucurați-vă!! Link către barca noastră: https://maxcruisemarine.com/max42sc-sailing-catamaran/ Mulțumim MULT Patronilor noștri. Acești susținători extraordinari ne ajută să ne menținem pe barcă, echipamentele noastre de cameră la zi și videoclipurile care urmează. Fără patronii noștri, aceste videoclipuri nu ar fi posibile. Pentru a vă înscrie în rândurile Patreon, vă rugăm să vizitați http://www.patreon.com/mjsailing sau Cumpărați-ne o bere prin PayPal! https://www.paypal.me/MJSailing sau Ajută să contribui la construcție cumpărând Lista noastră de dorințe Amazon! Pentru construcție: https://www.amazon.com/hz/wishlist/ls/2B2BOYEH9THAH?ref_=wl_share Pentru barcă: https://www.amazon.com/hz/wishlist/ls/2E2TEAT8G9R1U Adresa de livrare: Kentmorr Marina 910 Kentmorr Road Stevensville, MD 21666 Vă mulțumim!, Matt și Jessica – Obțineți marfa: https://mj-sailing.myshopify.com/ Videoclipuri realizate de Jessica, cu Matt și Georgie. 00:00 – Winterizing the Boat 01:10 – Introducere 01:40 – Învață o nouă limbă 03:09 – Jessica face o zonă NOUĂ!! 04:53 – Matt se leagă în tejgheaua de sus a bucătăriei 09:20 – Această cută superioară este o enigmă 12:19 – Oricum, cine are nevoie de o stație de navigație? 15:13 – Configurarea salonului nostru 19:00 – Muzica de închidere: Dress Up – Walking Hearts Hog Meadows – Guustavv Jazz Bars – Dusty Decks Viginia Highway – Tigerblood Jewel Wow Factor – Daniel Fridell Pandemonium (Tribute Version) – Echipamentul camerei Mondays folosit: – Panasonic Lumix GH5 – Microfon Shure VP83F – https://amzn.to/2rsIHLL – GoPro Hero8 Bărci anterioare: 1983 Trisalu 37 – aluminiu personalizat, construit în Quebec (Elements of Life) Unde am fost: 2,5 ani refit în Indiantown, Florida; Abacos, Bahamas; St. Barth; St. Maarten; Antigua; Saba; Azore; Irlanda; Scoţia; Norvegia; Anglia 1989 Sabre 34 Targa (Serendipity) Unde am navigat cu ea: SUA – Bahamas – Jamaica – Cuba – Insulele Cayman – Honduras – Guatemala – Belize – Mexic – Bermuda – Azore – Madeira – Insulele Canare – Sint Maarten – BVI – Software de editare USVI: Site-ul Adobe Premier Pro: http://www.mjsailing.com Facebook: http://www.facebook.com/mattandjessicasailing Instagram: https://www.instagram.com/mattandjessicasailing & https://www.instagram.com /mj_wayfaring/
source
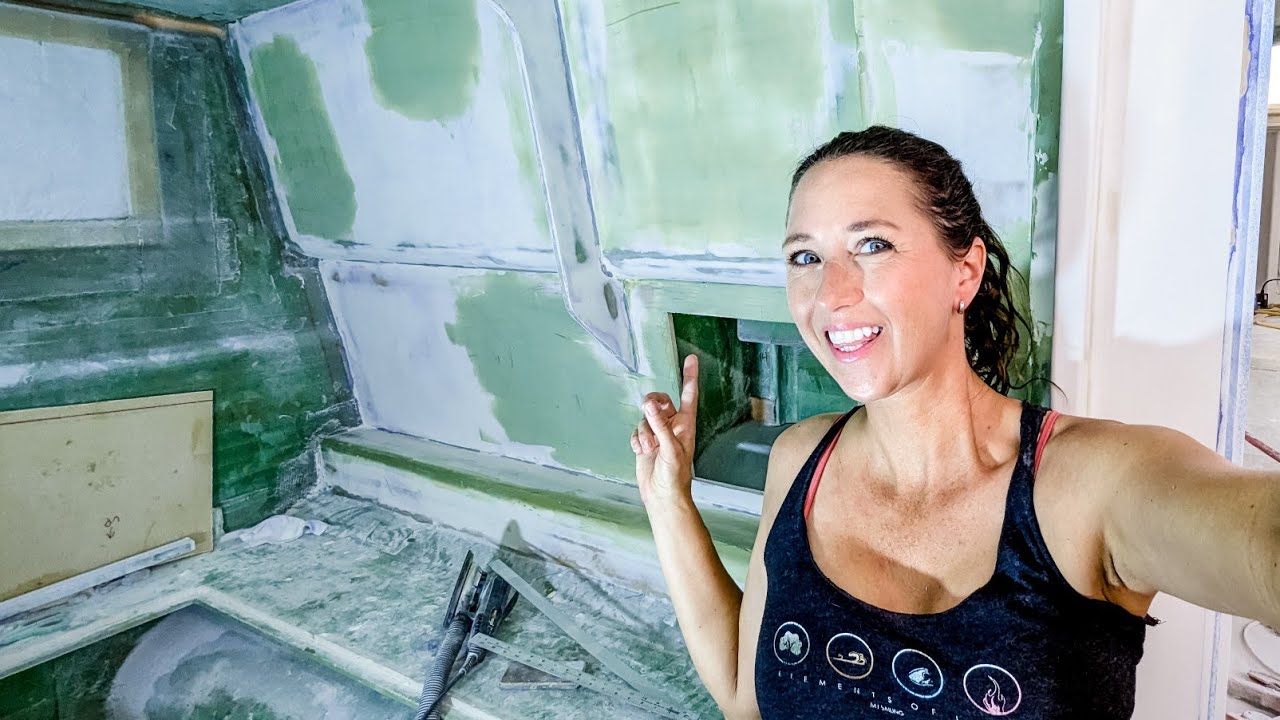
Ne luăm în considerare designul constructorului – DIN NOU!! (MJ Sailing – Ep 263)
27 thoughts on “Ne luăm în considerare designul constructorului – DIN NOU!! (MJ Sailing – Ep 263)”
Comments are closed.

Start speaking a new language in 3 weeks with Babbel . 🎉 Get up to 60% off your subscription ➡HERE: https://go.babbel.com/t?bsc=1200m60-youtube-mjsailing-dec-2022&btp=default&utm_term=generic_v1&utm_medium=paidsocial&utm_source=YouTube&utm_content=Influencer..mjsailing..USA..YouTube
I understand you are designing a salon area of a Cat. However, keep in mind, in the homes of most landlubbers', the kitchen, no matter the intent, becomes the gathering place in most homes. It's that way at my parents' house until everyone gets kicked out of the kitchen so the cooking activities can begin. On the end of the island is a sitting area with a 4' round, partial tabletop, with 4 wide based, light weight, swivel chairs, that you can't be knock over, easily. The table is almost completely round except where it joins the island.
Last night, when I went to a friend's birthday party, everyone stood around an island, in the large kitchen, where a 2.5' diameter platter of finger foods, sat on the island. The large kitchen, with a small breakfast nook, easily handled the crowd of 10-12 people, and a beautiful, silent, golden retriever seeking friendly petting.
Just keep in mind the kitchen/salon area is mainly for you two, but also for your occasional guest. The area should be built so that folks sitting in the salon can easily talk with someone working in the galley, and vice versa.
If you like to cook, and I do, I dislike any shadows in the food preparation area. Under cabinet lighting is necessary. The overhead lighting should be bright, but no hot. Maybe a smaller set of lights for the early morning, or late evening. A larger set of lights can be added for cooking, or entertaining at night. Keep in mind, a hot galley is not a fun place to be. It can be miserable. It is imperative that the air, in the galley, is kept moving so it remains comfortable to cook in. I speak from experience, cooking in homes we rented, and in our own home, before we redesigned the kitchen to make a cook friendly environment. There was a home we rented on St. John Island, The Virgin Islands. Like many homes there, the kitchen had no a/c. Talk about a hot box. It was awful. You could cook there without the sweet running down your face. There was no cross ventilation nearby. After the second night of cooking, we went out to eat for dinner the rest of our stay.
Now, on those days, in the winter, when it is cold and dreary outside, I can be found, in the kitchen. Besides our deck, the kitchen is my second favorite spot in our home. Fair winds and Bon Appetite. ☺
Good luck!
Most interiors of glass yachts are finished with Flow coat or marine carpet. You have taken on a massive job filling and faring the interior and I wish you all the best with it.
M&J …Seeing it come together. Looks like a great layout. The changes will hopefully add to functionality for you both.. Great Video.
I am loving watching you build this amazing Cat and am very interested to see you through completion. Haven’t missed an episode since long before the build started.
I love that you guys are using some great PPE. The masks are of great quality. They should prevent the Fiberglass dust and particles from being breathed in pretty good.
Are you aware that masks like these are meant to be worn on a clean shaven face? That you’re wearing it with a full blown, beautiful of course, beard is amazing. Very safe practice. I mean in 25 or 30 years when you start spitting blood up and have an agonizing cough that you can’t get rid of or control, you might want to have a look back at these videos so you understand when and why it’s happening.
Very dangerous. You can’t reverse the damage caused by even very little fiberglass particles in your lungs. You’re taking in heaps everyday you’re working on the build. It’s as bad as silica. I mean it’s 65%silica and the rest is other materials.
Please shave. Your throat and lungs will thank you. The beard will grow back when you’re done.
Don’t take my word for it. I don’t want to come off as sharp but your mask is doing as little as it could possibly do to protect you as is.
👍🎀👀
Those prefab panels should have a better surface finish… that job of fairing it is too much energy/time-consuming!
I just binge watched several of your episodes. Sooo much work it's making my headspin. It's not clear from your videos if you have day jobs or if you're working every day on the boat. What's your life/work balance schedule?
I love how at about 10:30 Jess mixes up her concoction with two dollops and a squirt. Newbies might use a scale… after some hard-earned experience the mixing can be done by feel to take into account environmental conditions and desired outcomes. 🙂
To keep that crease cut a piece of 6” scrap to the angle. Place a guide dowel above and below the crease. Cut two notches out of the angled scrap. Fair the angle. Run scrap along guides. Sand. Remove guides. Fair. Sand
Heavy brown craft paper for a template referenced from the overhead, scrap foam board that captures the angle for a fairing tool, and good luck for remembering where where you stowed them.
Not sure how prominent or subtle you want that starboard sloping downwards bow to aft line to be. Fairing with a laser outline, or chalked outlined height marks. A bead of sort fused to the starboard side. Thin wire, very small welding rod glued and fibre glassed, tiny rope fibre glassed, thin wood molding formed to the line and fibre glassed.
Those 4' led plug and play lights are great. Amazon 50.00
Set of 6. Awesome
Looking good 👍
Carry on crew.
Use a laser for the line
For all of the fairing, a 12" drywall knife will be a big help. for larger areas, an even longer knife is a great help. The longer the blade, the flatter the surface. For those chine corners, I would use a 12" steel drywall knife which the pros use with one hand, but I use two hands (one on each end for greater control). put one edge of the knife right in the corner and pull the knife horizontally along the chine. You hold pressure on the chine edge to keep the fill to a minimum and let the opposite edge float over the high-points. It is best to make one full length final pass to make it smooth and flat.
I saw Robby Layton use masking tape to mark off body lines when sanding to maintain/create the line in body work. This might work for the line your trying to maintain.
She’s probably better insulated than most homes in the UK 🤣🤣🤣
What do you mean by 'keep that line'? you mean you can't see it anymore once the stuff is on there?
The tape method described below is the ticket for keeping your line from disappearing. But I have another question. How rough is your fiberglass prior to fairing? I ask this because I don't understand the order of things. If this was a fiberglass car, like a classic Corvette for instance, you would apply filler (fairing compound) only to actual "dents". In your case this is going to be where panels come together or where you had a screw and removed it, etc. Then the entire thing would be sealed with epoxy primer. Then a high build primer would be sprayed and you would block sand this to make the finish perfectly flat. If your guidecoat showed that you still had some low spots you would spray more high build and sand it again until it is as flat as you want it. Spraying high build and sanding it is considerable faster and more efficient than using filler (fairing compound) on the whole panel. I just hate watching your guys have to do this to every exposed fiberglass surface in the boat if there is a more efficient way to go. I'm not boat guy, just a car guy, but this seems like a lot of extra work for Jess. LOL I'd seriously talk to a fiberglass car body specialist. If you need someone, contact me. I can help get some advice from someone near you who can come look at the boat in person.
How will you get the engines in their resting place, now that you're at this point in the build? Great videos!! Thanks for making them!!
Превет. я с Украины. смотрю каждый ваш видео ролик. Мне очень нравятся люди которые делают что то своими руками. Строить катамаран вдвоем очень сложно. Я верю что у вас все получится. не зная английкий. мне все понятно.
Great videos. Again. Prob a bit late but in future if you need to block windows off, you can oversize the foam by an inch or two on outside then a timber brace on inside to catch inner frame then a bolt or tie through both. Glazers use for temp repairs and prob take about 10 mins.
Keep up the amazing works and vids 😊
Thinking maybe you could snap a chalk line on that feature you are fairing then work from chalk line out? All the work looks great and I’m certainly not a fairing sensei but just wondered if that’s a practical approach maybe. Thanks
Here I sit in Florida at 35 and you will be below freezing tonight. I know my son and his wife are 12 miles from you. Glad you were able to close off all those air spaces. Be well, looking good!
Janie and Steve just turned me on to you!! Welcome to the "island"!
Evercoat has a product called plastic honey that would thin the body filler and would make it much easier to spread over large panels
A thought, to keep the line, apply a slightly thicker fairing compound and make a sandpaper on a hard block with a V bulge. Draw out a line onto the fairing and then this will allow you to sand out a straight line once the fairing has dried and you can use different spacers that the V block sandpaper can run against to reintroduce the straight line.