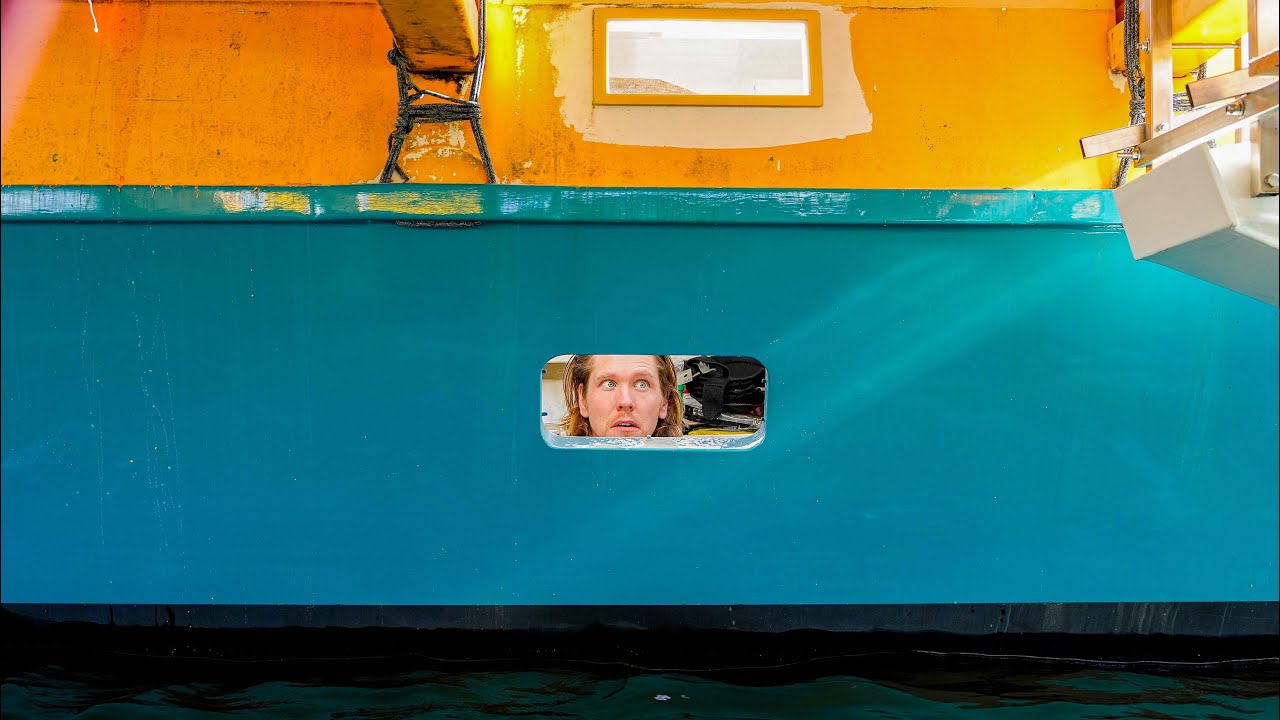
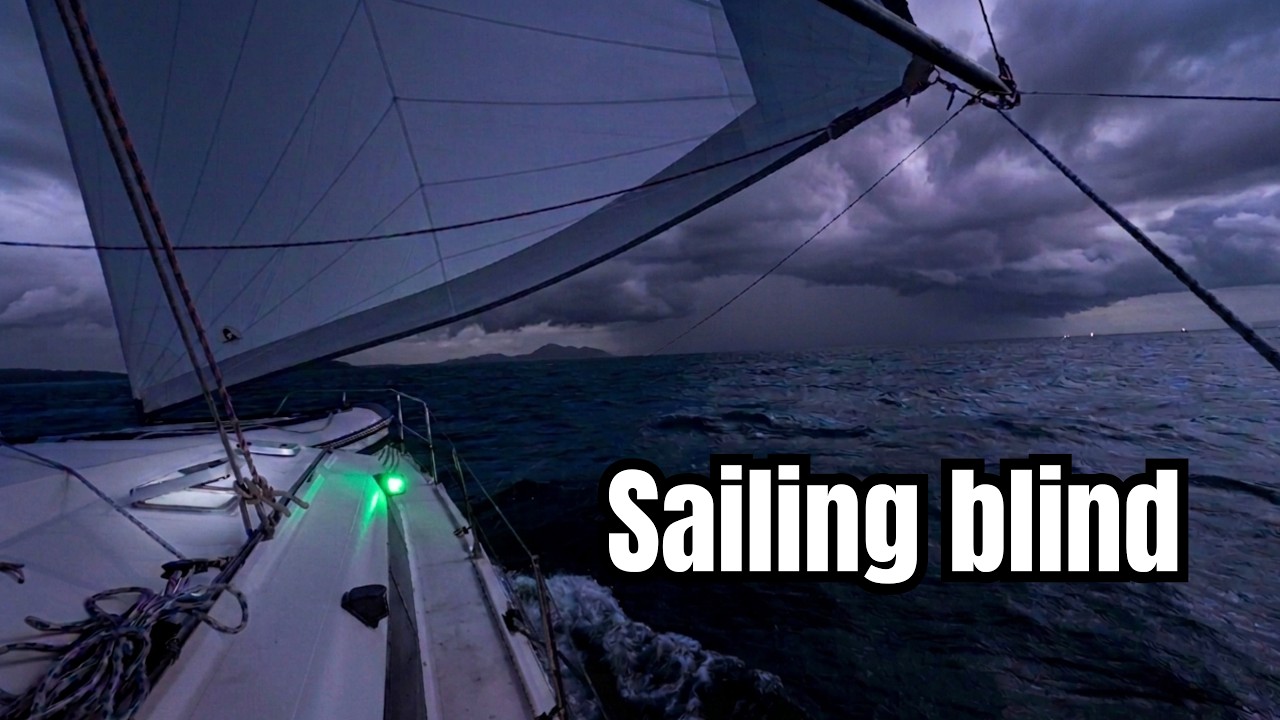
Aceste mici ferestre răsturnate sunt foarte aproape de linia de plutire și ar fi o problemă uriașă într-un ocean deschis, cu presiunea exercitată de valurile mari. în acest episod încerc să le recondiționez cu piese de la magazinele locale de bricolaj și bărci, în timp ce abordez și alte lucrări importante din proiectul meu Catamaran. bucură-te! Instagramul meu: @boat.fella Facebook: https://www.facebook.com/wildlingssai… Întrebări de afaceri: thewildlingsofficial@gmail.com Mulțumesc foarte mult oamenilor incredibil de generoși care folosesc linkurile de mai jos PayPal: https:/ /www.paypal.me/wildlingssailing Ko-fi: https://www.ko-fi.com/wildlingssailing Patreon: https://www.patreon.com/wildlingsailing Muzică pe care o ascult: https://open .spotify.com/playlist/22sIFakj1oGqZlpmXv3kgC?si=557a07debd3b4f64
source
Am reparat ferestrele periculoase de pe catamaranul meu oceanic
28 thoughts on “Am reparat ferestrele periculoase de pe catamaranul meu oceanic”
Comments are closed.

Great video.
Bloody nice work Mark.
Small and Big steps getting done there.
Sanding back the mast step timber looked like a bugger of a job but you've got it done.
If you have any more Compression sleeves to insert in RHS use tabs of masking tape or any other tape to hold onto them then peel it off once the threaded rod has been inserted but prior to tightening up the nuts👍
Cheers
Gday mate
Good job on the stairs.
You can use the yellow sandpaper "without the fluffy stuff" with a sander designed to use with "fluffy stuff" sandpaper by gluing the yellow stuff to a used pad of "fluffy stuff sandparer. Dunlop glue or Bison Kit works fine . You can avoid dropping the sheaves (bits of compression tube) simply by making a loop of sticky tape, hang the tube in the loop, stick the ends of the tape together and you can easily hold the tube in position with one hand whilst you slide in the M10 bolt with the other. I'd check how the portlights are fitted by drilling through one of the screw holes .They appear to be made out of alu If sub quality screws + sikaflex or similar were used the heads of the screws may have corroded away (galvanic corrosion) but the threads still under the hole. I'd through bolt the fixed side of the port lights with large head bolts going from the outside through the hull and nuts on the inside on the port light edge.
Such good work! <3
Your enthusiasm never ceases to amaze. I'm a retired electrician amongst other things. I've had boats in the past. If you need any advice let me know.
Hey Mark.
Good Week Bro.
A couple ideas for you –
Those little porthole windows below , likely wont leak where you put in the new foam , but rather where the plexiglass/glass connects to the frame. And then 100% those frames need to come out and be re installed properly and ultra secure. That is the LAST place you want salt water leakage. If you take them out I'll bet you could go to a local Glass/Window shop and they'd replace that glass with something thicker and safer and seal it to last 20 years. Then when re installing just bolt it thru or screw it in with Rivet Nut type inserts. (??)
Something I saw on another vessel with curved steps like yours was the guy cut his off except a 1" nub , and replaced with Skateboard Decks. It was a bit of work , but damn it looked cool.
As far as Electrical goes.
Contact Paneltronics in Hollywood ( Miami , Fla ) and they have tons of good used 12v dc and 115v ac breaker panels , and even on Ebay you can find that brand. IF you want to stay super cheap just ask the marina yard guys if there's any vessels headed for death row you could pay a couple quid for a decent breaker panel
DONT get a fuse panel. Get Breakers , and you'll need Minimum 8 , trust me , 10 or 12 even better.
Amazon has Ancor Marine Coax wire on sale lately. , you'll need at least 1 – 100ft roll of 14/2 ( $65 )
and maybe 50ft of 12/2 for any shore power outlet
under 40amp. Get some of the wire connectors that have the little flip ups and wires push right in.
Also while on Electric run Coax for your VHF wire and do you already have a VHF Radio ? If not look for a good used one. Some of the older ones from REAL Ships have bigger wattage output. Also on Amazon some Wire Loom covering and the tack on connectors to hold it along walls where needed.
You might wanna setup your Water tankage and run a line to your sink and a little 12v pump.
OR – use 5 gallon blue water bottles with those rechargeable pumps that sit on top , but instead of sitting the pump on top , just run the intake hose thru the plastic lid and put the pump next to the sink and there ya have a re-chargeable tap.
( did that in the Nomad Van )
Another option to think on is Showering , Also on Amazon a cheap Propane All in One instant hot water heater with shower head. Mount the unit somewhere safe and extend the handheld shower line up to 20ft.
You can even get a cheap privacy shower tent and stand on deck and have a hot shower , when weather permits.
Other ideas are Circulation of Air. Some 4" dryer hose and a few 4" inline fans and you can move a ton of air to assure your breathing clean and fresh.
It also might be close to time to for some Stanchion poles and lifelines. Look around at scrapped yachts for those parts. So many great stainless and chrome pieces on big yachts headed for the boneyard.
And how about your external lighting ? Red & Green on front hulls and then large white post on rear. And a SPOT beam LED on deck maybe.
One other thing to maybe keep an eye out for is a good used Tiller Pilot and arrangement to set that up on your Tiller. And what about a Manual Compass on Deck in a cool place near the Cockpit.
Well that's all I can think of this week. I do have a TON of stuff you could use if we could figure out logistics, maybe to UK and your parents could bring it from there. Tons of Small hardware and rigging related hardware that I have leftover from last couple refits.
Let me know.
Cheers & Beers 🍺 Mark.
Take Care.
Chris & Stella
Port Dalhousie
SV Jaz
Mark, just a note in regards to Acetone. It's a pooling gas when it vaporizes, which means it gets into the lowest areas of the boat that it can, and as a HIGHLY flammable vapor, that is extremely dangerous. Boats have burned to the bottom due to Acetone. I'd recommend that any time you work with Acetone, you try to do so outside, or at the VERY least, have a high volume of airflow into and out of your boat to reduce risks as much as possible.
Tá ficando muito bom parabéns amigo..
Great video as usual! I have been watching since the covid pandemic and you inspired me to take up sailing so I have finally joined my local yacht club to learn 😀our estuary also has free moorings if you can sink one so I'm hoping to buy a 26'+ monohull within the next 12 months
You might consider putting some tethering runs fixed like a monorail along the port and starboard sides that you can quickly clip on and off and move about aft and forward with minimal fear of gettting tripped up or going overboard in foul weather. I mean the stanchion things works, but does it really Captain Mark?…or is it Cap. Wildings?
I can't see a link to your patreon on your channel. I may be missing something, but I just wanted to point it out in case you were unaware.
Uh, nonskid on your deck? Those naked boards will be slippery as owl sh!it in heavy weather.
Rig a tent ffs!!!
is Action might be owned by Walmart?
If you aren't already doing this, a cheaper way to fill gaps with resin is to use sawdust as the filler.
Love to see you both helping Mark out on the boat, you are a lovely family and support each other enormously. You are all very talented and enthusiastic, safe trip over look forward watching you all hard at it. ❤️
Jippiejajajippiejippyhey…..
Shouldn't those port lights be opening outwards? Refit them the other way around, the big waves will force them closed.
Your channel is vibing well, shipmate! 🎉😊
hey fella, check out free range sailings utube videos on epoxy, I am thinking your threw holes for cabling. Troy would make a countersunk v top and bottom of a drilled through hole, tape the bottom, fill with epoxy to make a expoxy "rivet" then drill through the expoxy rvet for a through hole. it meant no water got to the timber or fibre glass, epoxy was held in place by the Vs', the through hole was servicable. some great tips in his videos as well as some Australian destinations. cheers
Have you tried Lanolin grease on stainless bolts when in contact with aluminium, it stops corrosion and lasts as grease, not that expensive and goes a long way
Haven't seen your videos in a while. You got way more then a 1000 views now days. Lol. I hope all is well with you and your.
Great video mark I love seeing you cracking on with the small jobs they really make all the difference 😊
Look forward to next week Mark. It’s always a nice start to the weekend seeing you getting on with the boat.
You've become quite the artist with fiberglass. Those step repairs looked fantastic. Nothing at all wrong with the music. Very tasty vibe.
Omg what a waste of paint. Why on earth did you mix all that paint? That stuff is far too expensive to waste like that. You've got more money than sense, and must be making a fortune from YouTube.
"Dominic Tarr" has good videos on YT on his Wharram