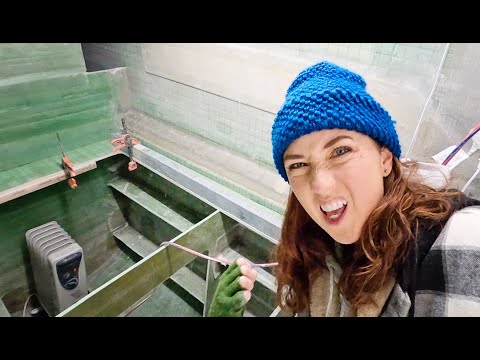
Lucrurile sunt pe cale să se îngusteze puțin în dormitor. Este timpul să ne întoarcem la construcție!! Și ai ghicit….mai multe vorbe de toaletă!, lol. Nu prea mult săptămâna aceasta, dar din moment ce ne-am dat seama unde vrem toaleta, este timpul ca Matt să construiască o bază pentru ea, ceea ce ne va permite să începem pașii pentru dulapuri și blaturi în acel spațiu în curând. Un alt proiect mai vechi pe care îl vizităm din nou este închiderea în sfârșit a zonei teșite din dana noastră în V din față, cu bucata de spumă pe care Matt a potrivit în zonă cu câteva săptămâni mai devreme. Odată ce este introdus, putem începe să ne gândim la finisajele pe care le-am dori pentru tavan și deasupra capului – și să ne uităm la carenaj orice care nu va avea o căptușeală. În cele din urmă, este timpul să lipiți cadrul de paturile de la pupa. Cu pereții etanși inferiori la locul lor și distanțați corespunzător pentru a plasa în cele din urmă motoarele noastre diesel în zonă, precum și având un centru de ridicare pentru a avea acces la ei, putem lega inelul exterior al cadrului pe loc. Vremea este practic aproape de îngheț în restul ambarcațiunii, dar datorită radiatoarelor noastre, putem să-l menținem frumos și vaporos în dormitor pentru o oarecare legătură. Sperăm să vă bucurați! Multă dragoste de la Annapolis! Jessica, Matt și Georgie Link către barca noastră: https://maxcruisemarine.com/max42sc-sailing-catamaran/ Mulțumim FOARTE Patronilor noștri. Acești susținători extraordinari ne ajută să ne menținem pe barcă, echipamentele noastre de cameră la zi și videoclipurile care urmează. Fără patronii noștri, aceste videoclipuri nu ar fi posibile. Pentru a vă înscrie în rândurile Patreon, vă rugăm să vizitați http://www.patreon.com/mjsailing sau Cumpărați-ne o bere prin PayPal! https://www.paypal.me/MJSailing sau Ajută să contribui la construcție cumpărând Lista noastră de dorințe Amazon! https://www.amazon.com/hz/wishlist/ls/2B2BOYEH9THAH?ref_=wl_share Adresa de livrare: Kentmorr Marina 910 Kentmorr Road Stevensville, MD 21666 Vă mulțumim!, Matt și Jessica – Obțineți marfa: https:// mj-sailing.myshopify.com/ Videoclipuri realizate de Jessica, cu Matt și Georgie. 00:00 – Introducere 00:30 – Realizarea unui perete în patul de oaspeți 02:03 – Nu este structural – dar îl voi încărca cu sticlă 04:23 – Spumă de tăiat pentru baza de toaletă 09:31 – 37 de grade, dar vom încă sticlă 11:07 – Pistolul de căldură arată o temperatură a golfului de…. 13:29 – Condițiile de gheață ale portului de agrement 14:22 – Nu știu unde se duce paharul!!! 17:09 – Cuplurile se leagă în dormitor 18:16 – A fost mai ușor decât credeam 19:24 – Închidere Echipamentul camerei folosite: – Panasonic Lumix GH5 – Microfon Shure VP83F – https://amzn.to/2rsIHLL – GoPro Hero8 – Bărci anterioare: 1983 Trisalu 37 – aluminiu la comandă, construit în Quebec (Elements of Life) Unde am fost: 2,5 ani refit în Indiantown, Florida; Abacos, Bahamas; St. Barth; St. Maarten; Antigua; Saba; Azore; Irlanda; Scoţia; Norvegia; Anglia 1989 Sabre 34 Targa (Serendipity) Unde am navigat cu ea: SUA – Bahamas – Jamaica – Cuba – Insulele Cayman – Honduras – Guatemala – Belize – Mexic – Bermuda – Azore – Madeira – Insulele Canare – Sint Maarten – BVI – Software de editare USVI: Site-ul Adobe Premier Pro: http://www.mjsailing.com Facebook: http://www.facebook.com/mattandjessicasailing Instagram: https://www.instagram.com/mattandjessicasailing & https://www.instagram.com /mj_wayfaring/
source
Vrei să mă bagi UNDE?!?! (MJ Sailing CATAMARAN BUILD – Ep 225)
32 thoughts on “Vrei să mă bagi UNDE?!?! (MJ Sailing CATAMARAN BUILD – Ep 225)”
Comments are closed.

That was a very tight area, but it looks as if you were able to get it all within the time frame you set for yourselves, so it's a winner in that regard. The base for the mini-throne looked very nice when you got it done. That must have been a fun challenge to mark then cut all those kerfs. The radius looked as good as anyone could have done so job well done on that task too. Do you put extra support underneath or is that space needed for the drain lines?
Put a time capsule under the throne.
Always a pleasure to watch this boat get built
You guys are incredible. I keep being amazed at the immensity of the task that you have taken on.
You guys are machines……
I really enjoy watching you two work but I can't help but admit the first thing that comes to mind watching Matt work on the glass is FRENETIC!!
I don't understand why you need to let the coves get tacky. I've done hundreds of feet of taping of coved seams with glass taper over and just applied the coves, and went right to the glass. AND I wet out the tape on a plastic covered workbench, roll it up and carry it to the application area. Way easier than rolling out vertical tapes!
lookin good guys
for removable fittings you can glass in tabs and velcro to make the section removable and re-fitable, tabs can be removed later if needed with less mess. Velcro is used on some expensive boat headliners for later access the toilet base with tabs in place could have bolt through tabs even drywall spring toggles and washers easy to reuse in the next area too. Or Duct tape 🙂
Good job Matt. Good job Jessica Keep it up. I can't hardly wait till you are splashing back on the big water sailing and flying again. Peace
God dam it.. Have you guys even looked at your faces for the marks you have been carrying over these years?? Please find a way to avoid it.. But, the build is good.. Mods are good.. Loads of love from India..
Haha, good use of bubble wrap. The temp extremes you both go through moving in and out of areas is crazy. I'm no health expert but that might all be good for your pores and skin…or not.
I just noticed, I don't think I've ever seen earbuds in your ears as you guys are doing all of these long tedious builds sequences. Safety? Always talking to each other? Nothing you want to listen to?
Stay warm!
Do you a tentative splash date?
I had to laugh at the title. Small spaces go with the territory.
The rounded pedestal for the head looks good. It will be easy to keep clean and less likely to stub a toe on than a squared off platform.
Россия напала на страну! Нас надо уничтожить! Мы как вирус СССР!
Matt and Jessica, is there any way for you to overlay clocks on the video to show us real and elapsed time for each part of the build you are showing us? You make it looks so effortless but there has to be a great deal more prep and clean-up time for each of these steps, as well as the learn-as-you-go efforts. This would be very helpful to those of us learning from you! Thank you once again for sharing this with us!
👍👍👍👍👍
Just a note. In aviation when you really need extra strength, you can include a layer or two of stainless screen mesh into the layup.
Sorry Matt but I would ray see Jessica. Good explain ing each step.
Amazing work
why this music sucks? cause it does
About bending the piece for the toilet: I don't know about the foam you are using, but I've seen foam were they leave glass off the inside of a bend. It then takes the bend, compressing the foam (glad on the outside keeps it stable), and then you glass the inside once it's at the desired curve. You could for the same by using your Dremel cutter to cry the section of glass that will be on the inside off.
I figure that technique was used on an airplane design (including the fuselage), so it will probably work on non structural parts of a boat.
The problem is this was designed in Vietnam. Great loving people and culture. The small places is no problem for them. Great loving culture. Just a little joke.
You guys do a great job@
Your videos prove that you two are not normal. If my wife and I tried to work together on a project this large one of us would be in jail for a life no parole deal.
Great job both of you.
Wow, that board is awesome to bend like it does. What do they call that material? I can think of some places I could use that.
I'm here for the click bait! What a cutie, I would stick her anywhere
Its coming along great 👍 you guys are a good team 👍.
https://youtu.be/Ojy-Ptvvo-o
I kind of hope this is your last build for a while. You deserve a few seasons in a comfy climate!!
That ain't snow and ice my dear come on up to Canada if you want to see some ice packs and snow..while during some snow storms the snow is literally up to the stop signs with snow. I'm serious that's what happened in St John's nfld in 200O/2001 we broke records that year with snowfall.