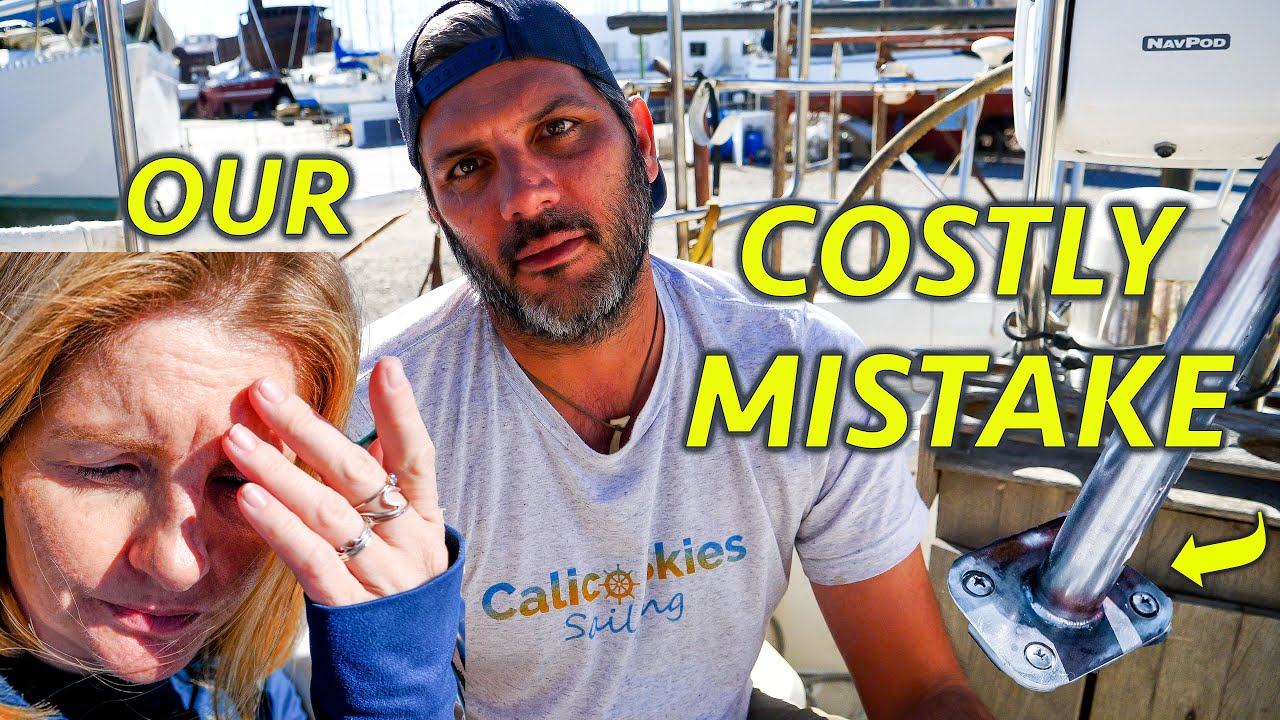
Îți place canalul nostru? Luați în considerare să vă alăturați echipei Calico Skies Patreon pentru doar 2 USD pe lună pentru a obține o mulțime de bunătăți suplimentare 🙂 https://calicoskiessailing.com/calico-skies-crew/ Acest episod se deschide cu o actualizare a stării construcției noastre arc. Ricky, sudorul nostru și-a început lucrul, iar suporturile care rigidizează structura sunt acum la locul lor. În timp ce lucrează la suduri, Bill plănuiește să continue șlefuirea fundului în timp ce verifică ocazional pentru a se asigura că planul „arcuiat” progresează. Pentru a confirma că geometria structurii este corectă în ceea ce privește amplasarea țevilor pentru plăcuțe, picioarele sau suporturile pe punte ale stâlpilor verticali de susținere sunt instalate temporar folosind șuruburi, dar ulterior sunt sudate permanent pe șina pupa înainte ca puntea să poată să fie sigilat corespunzător. Acest lucru ne oferă puțin spațiu pentru a pune banda butilic și epoxidic la locul lor. Pentru a ne oferi acces în zona punții la care lucrăm, folosim troliul și driza pentru a obține un avantaj mecanic și ne ajută să deplasăm structura doar cât să putem manevra în jurul picioarelor. Este un proces minuțios și ajunge să ne ia trei zile doar pentru a repara 6 dintre găurile punții. Procesul ar fi consumat totuși timp dacă nu am făcut această greșeală, dar ne-a provocat agravare și timp pierdut și ar fi putut fi evitat. Bill decide să investească mai mult timp în gestionarea procesului pentru a asigura un viitor mai lin. ~-~~-~~~-~~-~- Mediul marin este dur pentru echipamentul nostru de cameră, ajută-ne să filmăm! https://www.amazon.com/hz/wishlist/ls/22NXPOQ8KCUO4/ref=nav_wishlist_lists_1?_encoding=UTF8&type=wishlist 5% reducere la Comenzile TotalBoat! https://www.totalboat.com/calicoskiessailing Verificați magazinul nostru și cumpărați produsele noastre la https://calicoskiessailing.com/get-your-calico-skies-gear/ Tricou unisex cu mânecă scurtă Spinnaker nou https:// calicoskiessailing.com/spinnaker-tee/ Patreon este un angajament prea mare? arată-ți sprijinul și cumpără-ne o bere sau niște motorină 🙂 https://www.paypal.com/paypalme/calicoskiessailing
source
Greșeala noastră costisitoare: Vă rugăm să nu faceți asta cu construcția voastră a arcului! (CSS, Ep.174)

48 thoughts on “Greșeala noastră costisitoare: Vă rugăm să nu faceți asta cu construcția voastră a arcului! (CSS, Ep.174)”
Comments are closed.


Next video is now live on Patreon!
https://www.patreon.com/posts/ep-175-barrier-80165339
I was in Horta (via Google Earth) the other day and guess whos' insignia I found?
Philips head screws are terrible, use Torx or hexhead.
Wow bet ya all wont do that again! But Thanks for sharing! Love the positive tude ya all have fair winds n weather for ya alls project!
Ah, that stripped screw I remember when you first used the drill diver to screw it in, there were pieces of metal flying off of it and I actually thought then that you may have trouble with tightening that one. That's the problem with using a short Philips bit in the drill and a bummer if you don't have an extension. But, you will win in the end. Great job getting this work done now and not waiting till the whole arch is finished. Good video guys. Grace, well done with the editing too, the story is great to follow. And poor Bill with his bent and twisted spine!
It’s not a project until you realize which step you missed. Sometimes they are easy and most times they are not. Better safe than sorry for sure. Stronger is better than finding out later it was needed.
Donate for a Dream
I like how Bill, knowing full well the epoxy isn’t hardened yet but still decides it would be a good idea to jam a finger in it 😂
Great teamwork in this video and loved Grace dancing! You’ve made a lot of progress. What about the load on the arch? How do do you figure out if it will be strong enough? You both have great tenacity! ⛵️👍🏼
Cut the pipe 5 or so inches above, fix and reinforce the deck, then slide a bigger diameter pipe into one of the sides install it slide the larger pipe over the cut and reweld it .
I used to sell 3M 2-part epoxy in the single tube. Tip: don’t use the first bit of glue that comes out of the mixing nozzle. It’s usually not a good mix of part A and B. Squirt about a 1” circle on cardboard and toss it.
Drill two small holes in backing plate. Mount backing plate on under side of deck. Mount fitting and drill mount holes. Remove fitting. Overdrill mount holes from above but not thru backing plate. Fill mount holes with thickened epoxy. Position fitting and drill mount holes 2nd time. Mount fitting using butyl tape. If you want an A, does 3 holes using overdrill process with one bolt in place. Then do the one bolt. Always use hex head bolts.
You need a step bit
Measure twice, cut once, throw away…..Stuff happens.
Cheering you on in these projects. Your videos are giving me a break. Both my parents got CV. Mom made it out of the hospital. My Awesome Dad, 90, still in hospital w kidney failure. Need prayers. Your videos allow me to escape from all of the medical decisions. Blessings.
I knew the solar arch wasn’t going good last week 🥴hope it all works out .Hard enough to build an arch and you both speak English 😮Grace you are a trooper and Bill handles problems amazingly good !!!Hope the projects end soon,anxious for you to back sailing very soon.😊
Bob Sands. Use larger backing plates distribute the upload over a larger area, glue on first then drill and fix , use shorter bolts or cut off, long bolts are dangerous. your trying hard though, good luck , I enjoy your program.
You'll both feel so good when it is all done and looking great. Keep up the positivity and enjoy your time away from the job.
Started watching through seeing you with Delos. Have really been enjoying ☺ The only thing I would say, and really NO bad vibes intended, is that we have a hard time understanding when Bill talks at times,, it can be so fast and runs together specially when more excited. Just a thought, but maybe we are the only ones?
But do love you guys and seeing your adventures 💙
I know all of those agonies. I had to remove and rebuild my anchor winch, bad enough, but the builders of my boat put the electrical relay and connections box in an upside down back the front position in the fore peak which can only be access trough a 30cm access hatch. I pulled QL muscle and that took a full year to heal. I mounted the electrical box on a hinge arm so now it swings into the opening for easy servicing access in the future.
A good tool to have aboard is a 3 tonne Hydraulic Jack for those occasions when the sheet winches just can’t do it. Though if you get a hydraulic bearing puller which acts as prop puller as well, it could also do the job of pushing things apart to get the mastic in there. You did do a proper job of it though. Great effort.
That's a wild looking contraption my dude…
Can’t believe your welding above your fibreglass deck without protecting the deck
Second thing you have so much metal scattered all over your deck
Get a magnet and get rid of all those metal shavings
WORK, WORK, WORK – SO MUCH WORK.
Sorry to say, but that arch is not gonna stay together in a seaway don't put your dinghy on it! . The tubing is much too small and screws are not how it should be attached with a foot.like that
The biggest takeaway I get from watching so much boat work on youtube: buy an aluminum boat.
Always keeping it real! It will all be worth it in the end 💙
Just to let you know the older you get the more aggravating it gets, nothing seems to be simple anymore. You are doing great. Loved Grace's get up there at the end. brrrrrrrrrr
Bill – where is your eye & hearing protection? Lose either or part of these two and you'll suffer in later years. Please work safely – it only takes a second to put on protective gear. Just sayin". Cheers
Talk about perseverance, you have it in spades! Hats off to you both.
Why didn’t you while it was docked empty the whole boat of all that clutter and start front to back inside???
You make mistakes because you’re so easy going. You deal with mistakes well because you’re so easy going.
I learned what boat means yrs ago
BOAT = Break Out Another Thousand 🤣
Striping the screw head! One of several reasons to HATE Phillips screws! Other types strip too, but not as much. Get a long extension and a chuck for your drill. That way you can get around obstacles with your drill. And/or a right angle chuck or universal chuck. With the amount of tight squeeze places on a boat, it will be worth it.
Love the team work.
👍
What a monstrosity.
Building arch now w feet resting on sugar scoops (cat) that have teak. Wires from panels need to pass through as well. How would you recommend sealing? Thanks!
Great work! Please be safe and wear respiratory, eye and skin protection. You are setting an example for other DIY boaters
Cute old yard puppy! ❤️
“Every 20 minute job is a stripped screw away from being a weekend project!”
Nice episode Bill & Grace. Remember that "chores" = 📐⚙️ Boatyard work = 🏖️🍍🍦🏊❤️🍺🍕🤪 This Life is not always : babe's, bikinis and tropical islands with crayfish on the grille 💪🙏
Cant believe how much work youve been putting on fixing the hull….. Jises! =/
It's only a mistake if you don't learn from it! Is that a crack in the pipe between your fingers at 04:37?
I guess you figured out the epoxy probably did not set because you did might have used the first mix from the tube is often off ratio. A heat gun could have been used to accelerate the cure if within the ratio range.
Cheers Warren
Ok inject Sika Flex in the screw hole, this is the proper way anyways so underneath the foot doesnt form and hold a pool… No Worries
Hope a comment helps ..
Great Video !
A little hint on backing plates. The bolt hole are never perfect, always tilted at bit. Drill one hoe through the backing plate and then install the one bolt and backing plate and washer and nut. Then drill a second opposite the first and install bolt. Then drill the other two. You can also screw the backing plate in from underneath with two small screws to make sure it doesn't move, then drill the holes for the bolts. Thanks for the video. I designed but have yet to build a solar mount. I still don't have a quote from a welder but a goal of the design is to make it relatively easy to build (as well as strong and completely removable. I won't be welding to the existing stern rail. I'm not sure about the butyl tape in place of bedding compound so interested to see how well it works. Good idea using g10. Cheaper and easier to work with than SS.