Am făcut progrese bune săptămâna aceasta la șlefuirea părții interioare a carenei babordului și, în sfârșit, am găsit o soluție pentru a face scândurile noastre de fâșii de lemn pe traversa anterioară! Așadar, catamaranul nostru de 50 de metri de performanță/croazieră este pe cale de finalizare și eventuala noastră călătorie cu navigație în jurul planetei Pământ într-o circumnavigare. Amiralul Marianne, Căpitanul Blood și XO al nostru Brian, precum și alte echipaje ale S/V Lynx vor duce noua noastră barcă cu pânze în această călătorie epică odată ce vom termina această construcție DIY a bărcii noastre. Site-ul web S/V Lynx: https://www.svlynx.com Patreon (ajutați-ne devenind parte din echipajul nostru patron!) https://www.patreon.com/SV_Lynx?fan_landing=true 0:00:00 -Introducere 0:01:18-S/V Lynx Logo 0:01:33-Strip #50, ultima de pe canoea din port! 0:04:48-Slefuirea corpului babordului. 0:17:09-Planuri pentru modelarea arcului. 0:18:55-În sfârșit, o soluție la problemele noastre cu Forebeam. 0:31:21-Actualizare cu privire la programul de lucru al echipajului nostru în mai. 0:34:15-Mulțumim patronilor și sponsorilor noștri
source
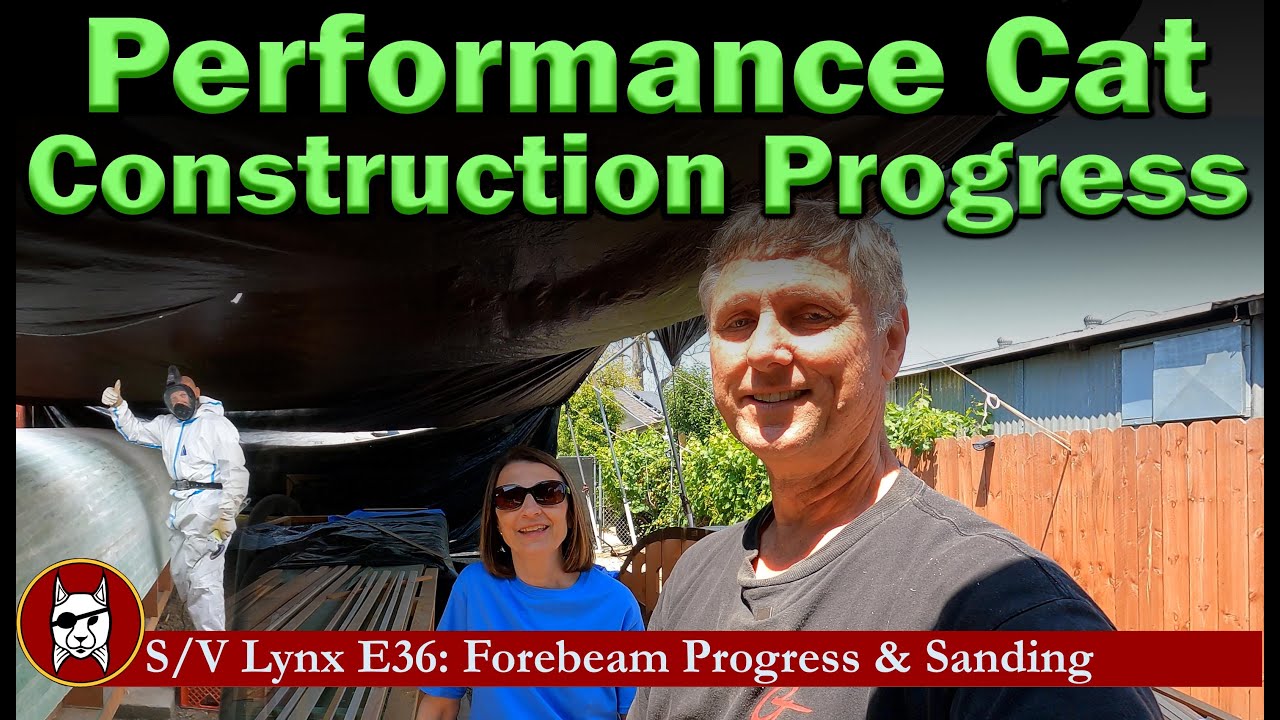
Kit E36: Progres și șlefuire forebeam!
24 thoughts on “Kit E36: Progres și șlefuire forebeam!”
Comments are closed.


I am thinking of a steam box..
You can use a heat gun to slowly heat up the wood. It will bend a lot easier. Just be careful not to burn it.
Try scarfing the joints at their widest top to bottom so that the scarf is in plane with the bend. Scarfing from the narrow side to side as you have and then twisting will load the end-grain to failure.
Would steaming the wood help?
It looks like you arrived at the right solution: better materials in the form of longer cedar stock.
FWIW, in my experience working with cedar (and other oily woods), it makes a ton of difference to clean the wood surfaces twice with acetone. Then when you mix up your epoxy, first apply a light coat of epoxy to both sides of the joint before you add the silica (or other thickener), then add the thickener to the mix, then apply the thickened epoxy to the joint and clamp as you have been. The idea is to remove the oil from the wood and then allow the thin epoxy to soak into the dry wood fibers. (Sorry if I am describing your current work process, I didn't see that in the video).
…One more thing. Excellent work on the powered filter masks. Regular filter masks work well, but are so much more uncomfortable that there is always a temptation to remove the mask when the work gets taxing (Which could mean that workers are breathing deeply without a mask when they are making the most dust). Making your protective gear comfortable in the SoCal heat is a smart way to remove that tension. Good luck with your project. I am looking forward to seeing it come together.
I know you don't want to soak them unless you have to but I just thought that I would throw out an example of what I did using water.
Last summer I had to warp some very strong 12ft 2×8 lumber to fit a boat trailer. These had to bend and twist in 2 different directions just like the wood you are working with.
I laid out a tarp on my lawn and propped up the sides and ends with some lumber I had laid around then filled the resulting trough with water.
I then began soaking the pieces of wood I needed to warp and placed supports and weights on them to get them to bend to the approximate shape I needed. I left them like that for over a day
When they came out they were very flexible and easy to work with.
Seems like you have a drying problem to solve which in the hot dry Southern California sun should be easy to do?
I noticed, once you pulled the majority of your screws and washers, that you have a myriad of screw holes to fill and sand. Most people would usually do this as an additional step, requiring filling, curing time, and then sanding flush. I would usually recommend holding off filling the holes till just prior to applying your cloth. Fill the holes with thickened epoxy, and apply the cloth over the wet epoxy, permitting it to self-level, and skipping the additional step of sanding. However, since you’re fairing with a longboard, before applying the cloth, it would make more sense to fill the holes now, and fair them while sanding with the flap-disk and longboard.
@SV LYNX- Thanks for documenting this build! Everything shared with this channel is excellent.
Don't need a response, just wanted to say that going to the longer cedar strips is a good solution. I think additional relief cuts is the best alternative to soaking the strips.
Even if other subscribers/content viewers are less than excited with seeing all the sanding involved, it's an important part of construction and really informative. I hope they'll exercise even more patience when 'fairing' process get going! 🙂
While 2 yrs is a considerable amount of time, I am SO looking forward too following your weekly progress (& cheering you all on!) as SV Lynx grows from simple parts to a amazing quality vessel. It will be even more fun to see where you go and the adventures once She is sailing!
Please remember, do take time away from the project so you're sanity levels remain in check! Sharing those is good, showing other activities, displays the mental health sides & helps to convey the realities regular people (I did not say 'normal'…) building a dream. ❤
All the best!
M-
PS- Have you considered setting up a PayPal account for SV Lynx? For people supporting this way, a larger % of the total actual $ contributed gets to the project…
Well, the art of buildings boats, using wood as the primary material, is becoming a lost art.
I look at your floor beam form, and do not see an overly complex curve. However, the wrong materials and technique will make it harder than it needs to be. For example, the lignum in the wood cells, affect how easy the wood bends. Wood that has been kiln dried is harder to bend, and breaks more often, than wood that’s been air dried. The kiln drying process “sets” the lignum in the cells, and makes the wood stiffer. While a lot of this can be overcome by the application of steam, to soften the lignum, it’s easier to just find air dried material. Additionally, changing the thickness of the material can also make bending easier. Using two layers of 3/8” material, rather than a single layer of 3/4” material.
There is a reason why I think student architects should spend their summers building things, and naval architects should occasionally “eat their own dog food” and actually build some parts of the things they’re designing. You are discovering the joy of buildings hull number one.
I am glad you are finally starting to call them hulls and no longer canoes😂
👍
What do you guys do for income? I don’t see anyone working except for the boat build. You guys are doing a great job and I am very interested to see the process. Is Brian an employee or just good friend?
Could you use plastic stripping instead of wood? I have seen long pieces of plastic at home improvement stores.
Why aren't you using foam strips for the forebeam. Won't wood be subject to rot over time?
One thing I learned decades ago, when working with epoxy and cabosil is to sand while still green the bulk of sanding that needs to be done. It sands much easier before it gets rock hard with full cure of a week. Here's that basalt vs bullet video you mentioned https://www.youtube.com/watch?v=FE7c20jjxrE
You’re going to cut the time due to reducing the learning curve too. Looks like you’re building a boat! ☺️ stay safe!
I wonder if it would be possible to make a flat fiberglass board and the cut the stripes out of it to use instead of wood for the forebeam ?
Looking good guys, if i could make a sugesstion with the bow, cut planks off at frame 0 and build a sacrificial bow out of foam all shionning cats used to be done like this im suprized the Schionning team has not sugested this option.
Nice one… any stage during this build were vacuum bagging will be used..? Anyways, looking forward to your next video.. 🙂👍
Someone tell the old bald guy to put the hood up on his "bunny suit"; works better that way.😆
Hey Philip – at 11:46 you mention "reducing thickness by 10 % " – is that the DuFlex foam hull thickness you are referring to and if so, what thickness panel have you spec'd for the hulls if I can ask? (Or did you mean reducing the 'x' many layers of basalt overlay by 10% as compared to e-glass? )
Thank you again for the time taken to diligently show your progress …and problems.
The kerfs will work. I have built some major deck projects and other carpentry that required cutting kerfs and it worked well. Your progress is great and I enjoy watching your boat come together.
Hello! Just curious on what sort of resin used by Shioning to laminate those green foam sheets? I also feeling weird every time you use grinder. From my experience it is too powerfull. Any small mistake could ruin a lot. Not perfect surface left after compare to eg. belt sander. But I like your new sanding equipment! Good for smooth finishing. I am personally using 6" orbital with purple 3M disks and it works great! Sanding media is the key. Now I am start worrying on what's happen if you lay glass on non perfectly curved and sanded surface. It might catch some air which you definitely don't want under the waterline.
Finally someone with a decent microphone